Series 2 | Roaster Maintenance Tasks
The following three physical maintenance tasks are required to ensure the health and optimal performance of your Bellwether Roaster.
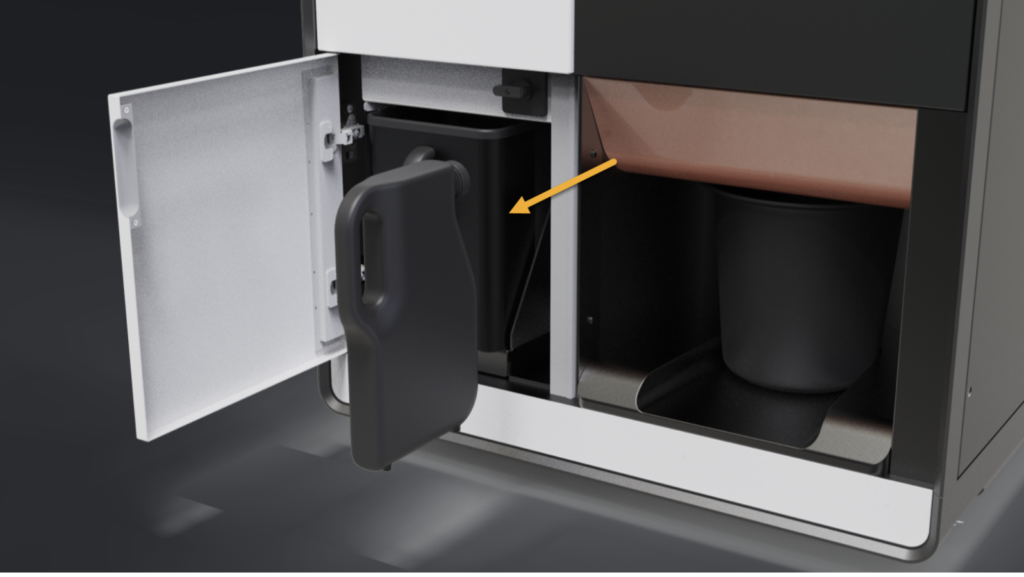
Empty the Chaff Can
The chaff can is located in the left maintenance cubby, at the bottom of the device. Every six roasts, the following process will need to be performed:
- Open the left maintenance cubby, and remove the Chaff can.
- Empty contents into your compost bin.
- Insert back into place, and close the left maintenance cubby.
On the Roaster
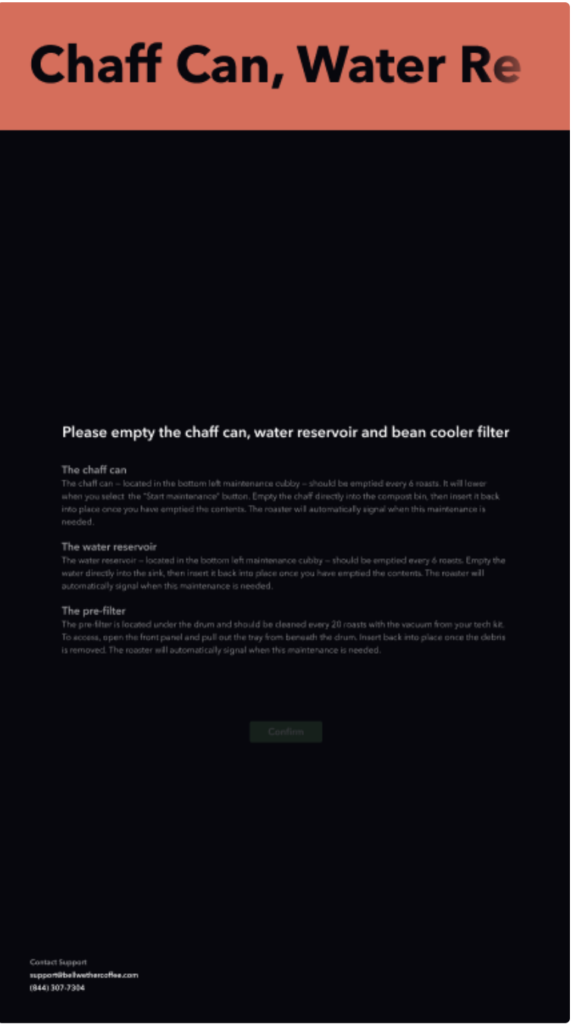
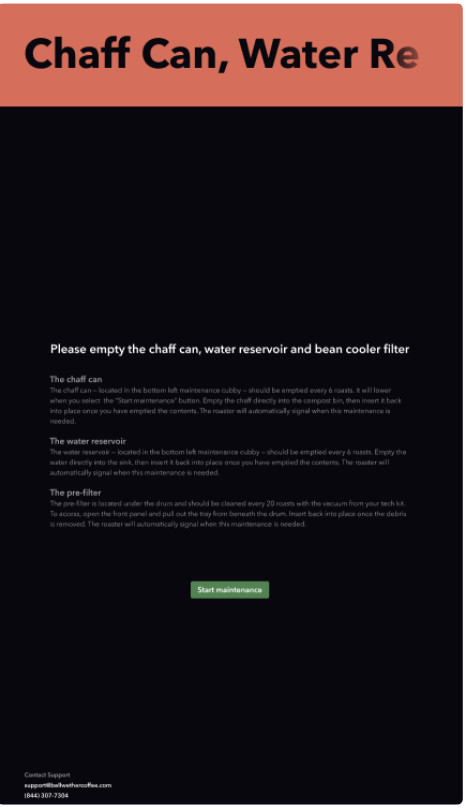
The Roaster device will alert you when this action is required (every sixth Roast) with the following alert:

Alternatively, if you know the maintenance window is coming up, you can open the help menu, and you will see the following alert in the help tab as the counter approaches its limit:
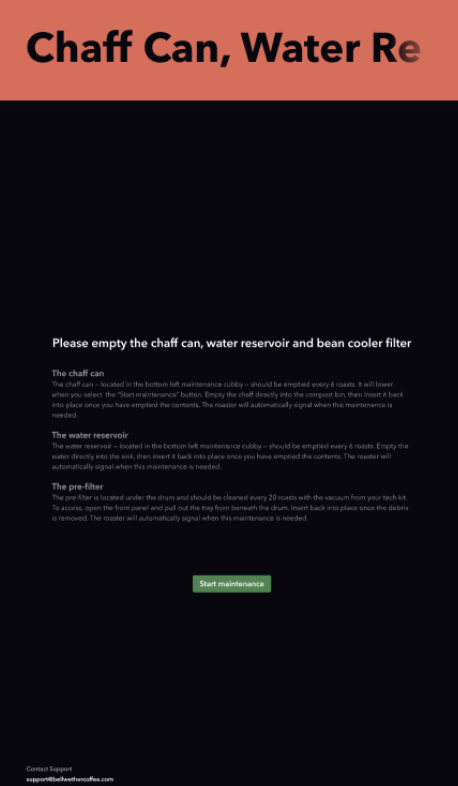
Click Start Maintenance.
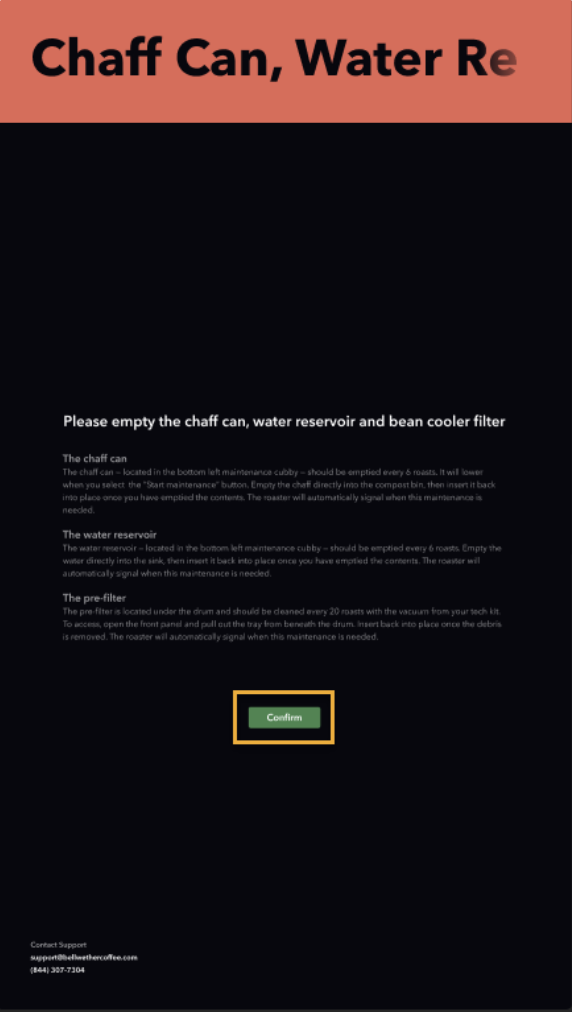
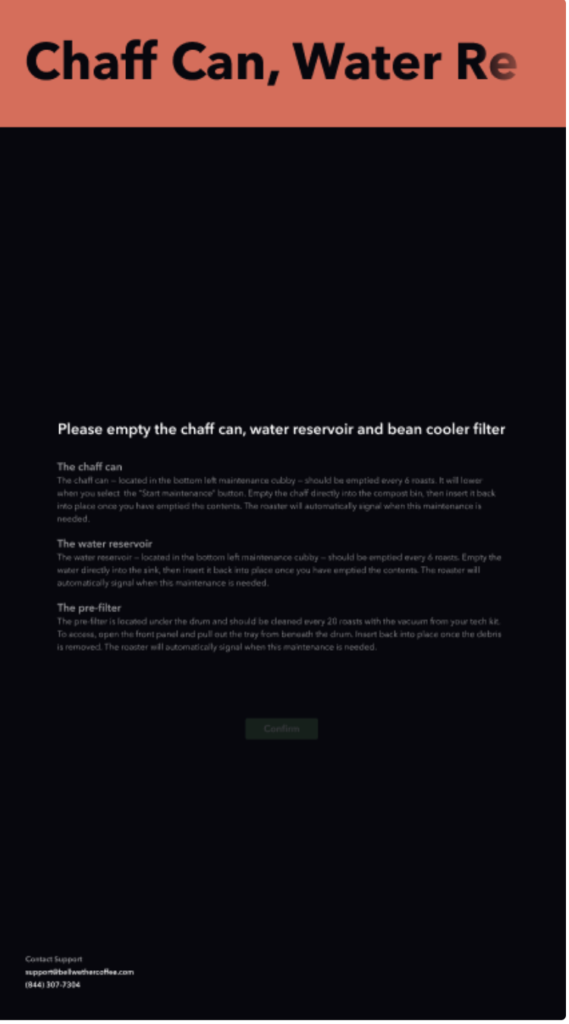
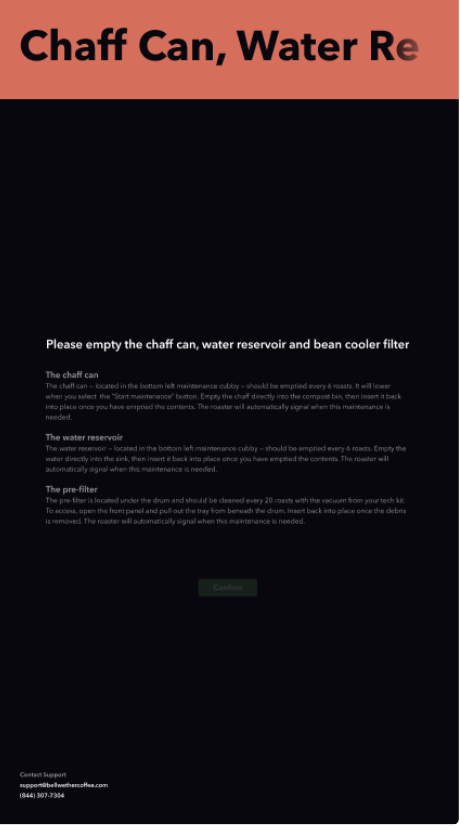
As you perform the tasks (pulling out the components and replacing as directed above) you will note that the Maintenance Alert screen is changed, with a greyed-out confirm button at the bottom.

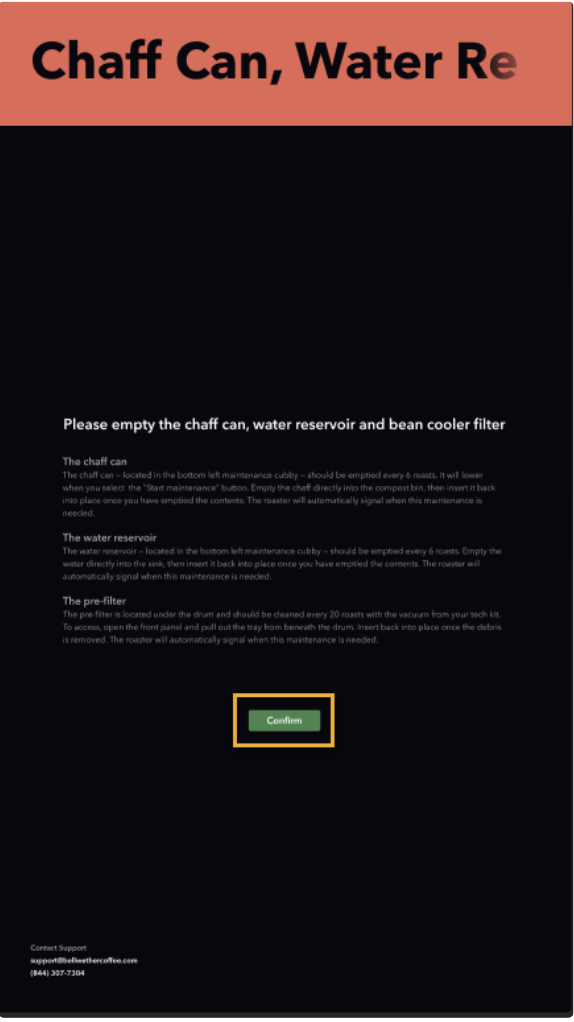
Once the tasks are completed, and the Roaster recognizes that the components are replaced, the Confirm button will appear. Click Confirm, and return the roaster to a ready status.
Empty Water Reservoir
The Water reservoir is located at the bottom of the Roaster device in the right maintenance hatch, below the Pre-filter (to be covered in the section to follow). As with the Chaff can, this maintenance task is required every 6 roasts.
- Open the right maintenance cubby, and remove the Water Reservoir.
- Empty the tray directly into the sink.
- Replace the Water Reservoir, and close the door.

On the Roaster
The Roaster device will alert you when this action is required (every sixth Roast) with the following alert:
Alternatively, if you know the maintenance window is coming up, you can open the help menu, and you will see the following alert in the help tab as the counter approaches its limit:

Click Start Maintenance.
As you perform the tasks (pulling out the components and replacing as directed above) you will note that the Maintenance Alert screen is changed, with a greyed-out confirm button at the bottom.
Once the tasks are completed, and the Roaster recognizes that the components are replaced, the Confirm button will appear. Click Confirm, and return the roaster to a ready status.
Clean Pre-Filter Canister
The pre-filter is located in the right maintenance hatch under the drum and should be cleaned with a shop-vac every 20-24 roasts.
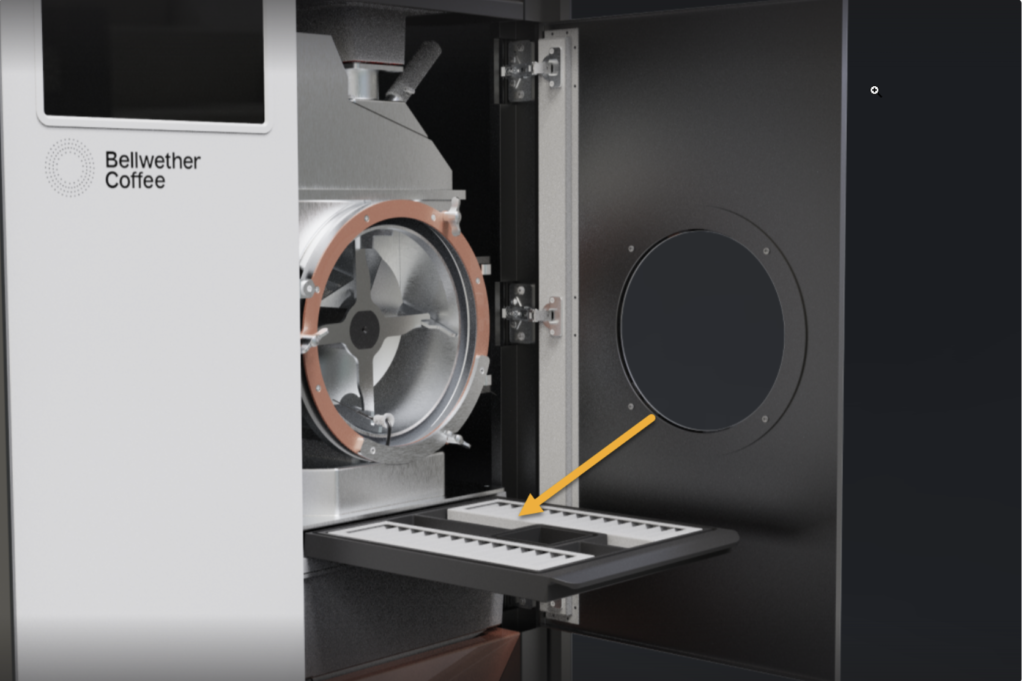
- Open the front panel.
- Pull out the tray from beneath the drum.
- Vacuum the debris from the tray.
- Once the tray is clear of debris, insert the tray back into place and close the panel.
On the Roaster
The Roaster device will alert you when this action is required (every sixth Roast) with the following alert:
Alternatively, if you know the maintenance window is coming up, you can open the help menu, and you will see the following alert in the help tab as the counter approaches its limit:

Click Start Maintenance.
As you perform the tasks (pulling out the components and replacing as directed above) you will note that the Maintenance Alert screen is changed, with a greyed-out confirm button at the bottom.
Once the tasks are completed, and the Roaster recognizes that the components are replaced, the Confirm button will appear. Click Confirm, and return the roaster to a ready status.