Roasting + Profiling FAQs
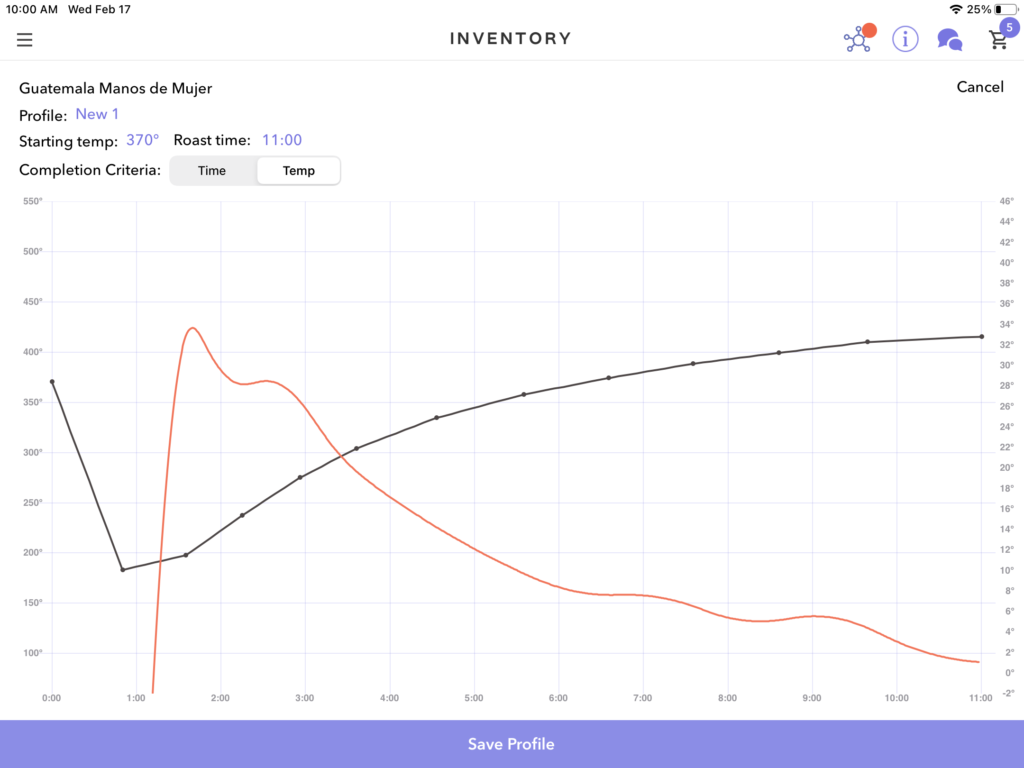
Table of Contents
Bellwether vs. Others
Top 5 for Creating Profiles
Time + Temp Recommendations
Roasting Visual FAQs
Airflow
Batch Size
Post-Roast Considerations
What’s the difference between using Bellwether Roasters vs. Traditional Roasters?
If you are accustomed to traditional roasters and are using a Bellwether Roaster for the first time, you should use the same basic principles. Your roast curve will look similar to those on other roasters with a couple of notable differences:
- On a Bellwether, you define the result — not the process. You will not be adjusting gas valves or airflow in real-time, but instead, you will be drawing a curve on the Bellwether app and then tasting the results. You can adjust the roast profile curve to more precisely hit your flavor goals. When you’re happy with the result, you can repeat the profiles exactly, experiencing consistency like never before.
- Like all machines, there are physical limitations to what roast curves the machine can follow. While the Bellwether has ample power, just like conventional roasters, laws of physics still apply.
- From 0—1 minute, 95% of the curve’s shape is determined by the batch size and charge temperature.
- The rate-of-rise of the coffee temperature will peak early and tend to decline as the roast proceeds.
- Since metal stores much more heat than air, Bellwether uses the metal roasting chamber’s temperature to determine the ideal preheat temperature (i.e., the “charge temperature”). Other roasters measure air temperature, which is a less reliable predictor of how much heat is stored in the roaster. As a result, the charge temperature on a Bellwether Roaster is usually around 75°F lower than you would see if you were using air temperature as your measurement.
What are the top 5 things to remember when creating roast profiles?
1. Don’t try too hard to manage the first two minutes of the roast. Just set a charge temp and let the roaster do its thing. More management leads to worse results this early in the roast cycle.
2. Try and get your profile in line with the roaster and coffee’s natural behavior at 2:00. A good metaphor would be to try and “catch the wave” with the turn around reconnecting right at 2:00
3. Make sure you are clear about which parameter you would like the coffee to discharge based on: choose from either time or temp.
4. Generally speaking, the ROR (rate of rise) should spike and then decline throughout the roast.
5. The first 4 mins are when you get as much of the coffee beans’ density to temperature, so you want to get it hot enough, so you are not just baking the outside, but heated all the way through.
Time and Temperature Recommendations
What is the recommended charge/starting temperature?
350 +/- up to 25 degrees. The higher the charge temperature, the more aggressive the profiles it can roast.
What is a recommended time for the turn-around to begin?
The turn-around begins immediately – generally begins climbing: 45secs – 1:30mins.
What is a typical roasting time for light, med, and dark profiles?
● Light: 9-10mins
● Medium: 9-11mins
● Dark: 10-12mins
What are typical discharge or end temperatures for light, med, and dark profiles?
● Light 400-415° F
● Medium 415-430° F
● Dark 435-450° F
What is the max end temperature you would recommend?
450°F
Roasting Visual FAQs
When should the turn-around meet back with the dotted line?
Before 2 mins (1.5mins – 2 is normal)
Why should the bean probe dip below the black dotted line?
Dotted line = desired curve. If the curve is set too low, the roaster will assume it does not need to apply heat. But almost all successful roasts rely on aggressive heat application directly after the turn-around.
Designing a profile that is well above the natural turning point for the batch size and coffee moisture/density will cause the roaster to engage in the correct behavior.
How long should the turn-around time be?
This is determined by the batch size, coffee weight, and density and is not generally changeable/controllable.
How can I stop the RoR crashing at first crack? Can I manipulate software for this?
The sudden loss of heat to evaporation at first crack limits the roaster’s ability to raise temperatures at this time. We usually find that you need to set your rate of rise (RoR) to 10 degrees or less during first crack.
How do I identify first crack when I can’t hear it?
First crack on our machines typically happens between 390-400 degrees F. One way to see this happening while roasting is the ROR begins to decline more sharply around this time.
Can I adjust the smoothing settings for the RoR?
There is no way to adjust the “smoothing settings.” We figured, if the graph looks jagged or smooth, it does not have to do with how the coffee tastes in the end. (Smooth does look prettier, though)
Airflow
How does airflow work on the Bellwether?
Our roaster isn’t like a Probat, Diedrich, or San Franciscan where you control the airflow manually. We have a blower in back that spins faster or slower as needed to push hot air into the drum.
The roast algorithm controls when the blower needs to turn up or down, depending on how well the profile is tracking – the air is recirculated, and the blower adjusts, but we never dampen the airflow or open all the way up like you do on some other roasters.
Batch Size
Why can’t I roast more or less than 6 lbs of green?
The answer in short is consistency, quality and thermodynamics.
Here’s the long answer:
The roast profiles designed at Bellwether are done using 6lbs of green coffee, and any variation in weight can produce a different result than what was originally intended.
We roast, cup, and tweak profiles so that they taste great and track well. Coffee is dense and has a high moisture content. When 6lbs of green coffee enters the roaster, it decreases the roasting chamber’s temperature by 200F. It will take most of the roast cycle just to regain that 200F. The profile is built to respond to that shock and respond with the perfect amount of heat. Switching batch sizes throws off that critical relationship.
We hope in the future to be able to offer variable batch sizes, from 4-7lbs and will keep you updated as the product and functionality evolves.
Is it important to weigh my green coffee before roasting?
Weighing the green coffee you are about to roast in your Bellwether is very important for roast consistency and making sure your coffee will taste great. So please, always weigh the green coffee that you are about to roast. Remember to always only roast 6lbs of green on your Bellwether.
Post-Roast Considerations + Questions
I like to roast dark, but I am not seeing as much oil on the outside of my roasted coffee as I am used to. What is going on here?
Good question! The primary method of heat application, as determined by the roaster architecture, makes a big difference here.
For example, a roaster that is primarily conductive, like a Probat, i.e., the primary heat application to the coffee is via the hot drum, will end up having visibly more oil on the outside of the coffee after roasting at the same roast level than a more convective roaster, like a fluid bed roaster or a Loring, i.e., the primary heat application is via the hot air.
The Bellwether is a specifically designed mix of both convection and conduction! If you are used to seeing more oils on the beans, it may be because the roaster architecture is different from what you are used to, but it may be at the same color level.
Most importantly, please taste the coffee you are roasting to compare!
When can I start tasting, serving, and packaging my roasted coffee?
Roasting on-site means that you will have incredibly fresh coffee. After you have roasted, you can bag your coffee immediately, but you will need to allow the freshly roasted coffee to degas for 3-5 days before serving. Your coffee will degas in a sealed bag or a lidded container.
When you roast coffee, gases like carbon dioxide, form inside the bean. These gases escape from the freshly roasted coffee after roasting and interfere with the flavor. Don’t worry, carbon dioxide in your beans isn’t a bad thing: it has an important role in coffee quality, as an indicator of freshness.
We recommend serving within three weeks of roasting.
For more information about packaging, please check out our Roasted Coffee Packaging Article.